Manage your company profile
Review agency details, branding, sales cost access, and configured limits.
Profiles → Company Profile
Step by step
- 1
Open Company Profile and review company name, email, phone, currency, status, and limits.
- 2
As the company owner, edit Legal Name, Display Name, email, phone, country code, timezone, and address where needed.
- 3
Review Sales Cost Access before changing whether sales users can edit cost information.
- 4
Use Header Logo and Voucher Footer Logo / QR to update the available document branding assets. Follow the file requirements shown by the upload controls.
- 5
Save your changes and review the affected company details or document. Check monthly invoice and user limits here when creation is blocked by a limit.
See it in the workspace
Actual portal screens. Private values are hidden where needed. Open an image to see it at full size.
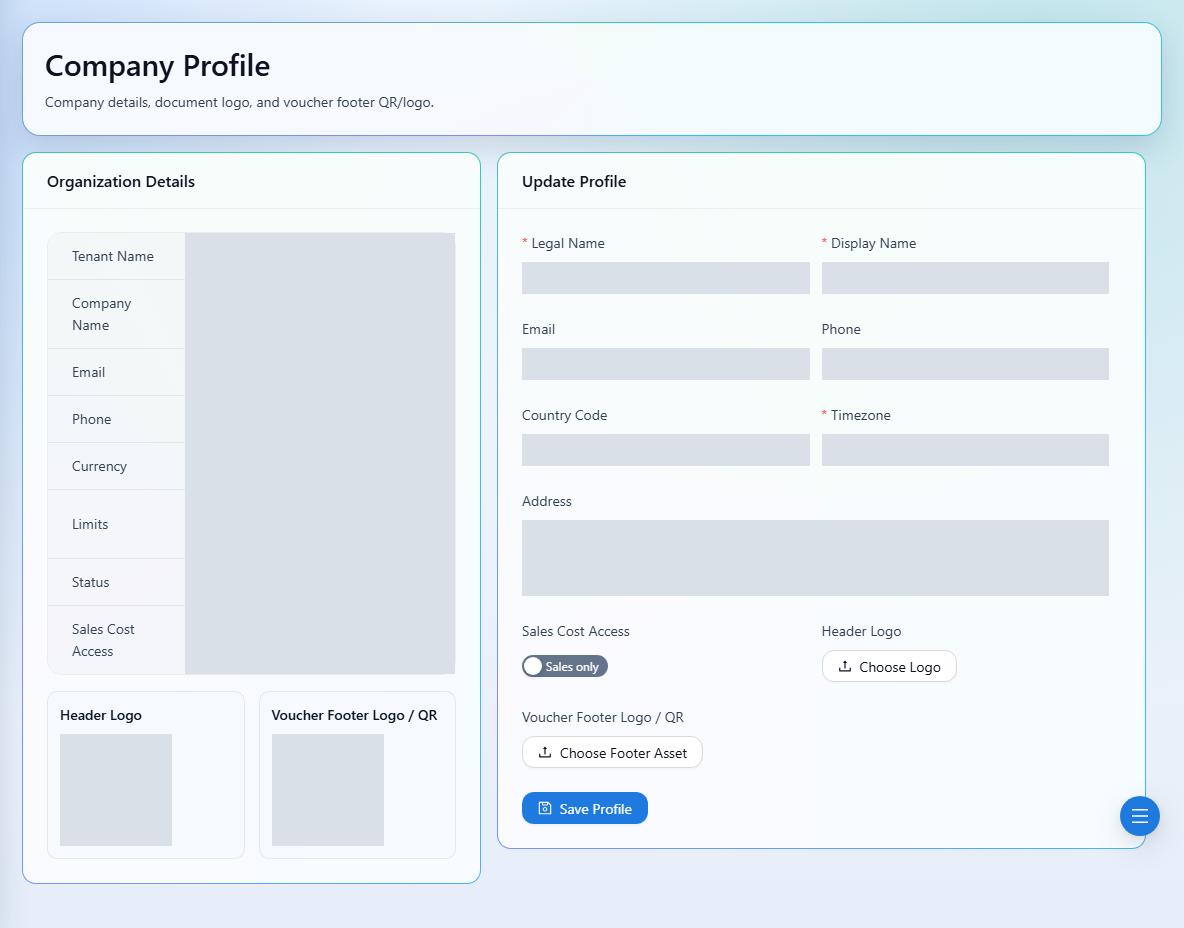
Company profile updates require the company owner role. Check document previews after changing branding, and do not assume display settings change financial records.