Receivings: record and track received amounts
Keep a receiving record with payer details, staff history, and a printable slip.
Finance → Receivings
Step by step
- 1
Enter the Amount and Paid by details in the receiving form.
- 2
Choose an optional Reference customer and add Notes explaining the receiving. Submit the form after checking the amount and payer.
- 3
Use Receiving history to search records and review the receiving number, received-by user, status, and update history.
- 4
Use Print receiving receipt for a copy of the receiving slip.
- 5
If your role permits editing, update the record or choose the appropriate Received or Clear status. Review any deletion confirmation; deleted rows remain in history.
See it in the workspace
Actual portal screens. Private values are hidden where needed. Open an image to see it at full size.
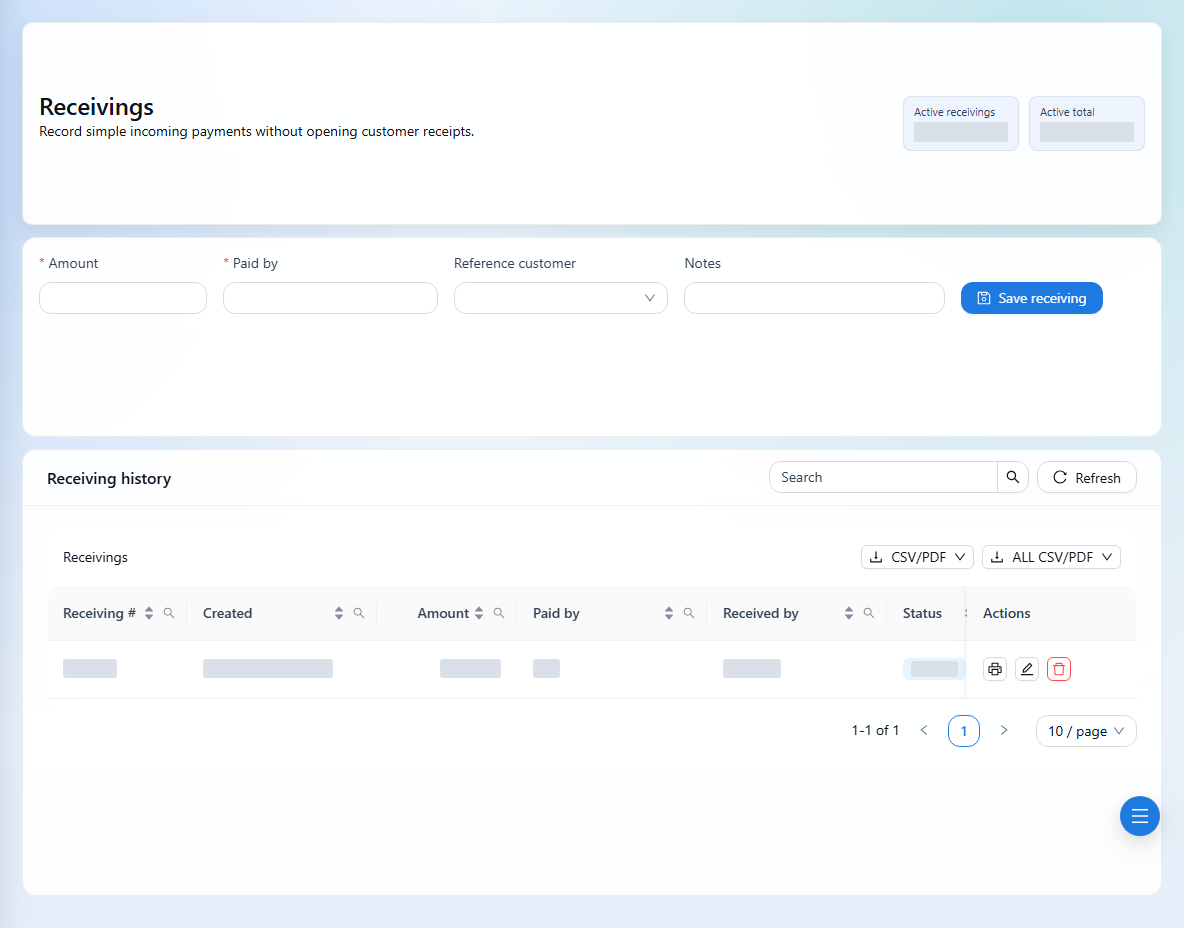
A reference customer on a receiving is not an invoice allocation. Use Customer Receipts when recording settlement against invoices.